This post is my study note from the past few days. It includes 1) Configuring and installing Debian on the QEMU virtual machine. 2) Compiling a Linux kernel that supports KGDB and initrd. 3) Using gdb and KGDB for real-time kernel debugging.
這篇文章是這幾天摸索的心得,其實還沒包含如何去玩 kernel debugging ,因為我還不會XD。 文章分成三個部份:1. 設定與安裝 Debian 於 QEMU 虛擬機器、2. 編譯 Linux 支援 kgdb 的核心以及 initrd、3. 使用 gdb/kgdb 做核心除錯。
There are many online tutorials that boot a pre-compiled kernel image with busybox to boot in QEMU. However, my school project requires me to examine the physical memory while running Firefox, a more complete operating system is needed.
網路上許多 kgdb 的教學都是拿編好的 kernel image 搭配 busybox 來載入 QEMU 開機,但這次學校作業內容包含執行 Firefox,所以需要跑在一個較完整的作業系統上。
Setup QEMU VM
First, we need to create a HDD image with qemu-img:
首先,要在安裝一份運行再 QEMU 上的 Debian 系統,第一步是用 qemu-img 產生一份硬碟 image:
1
| |
This will create a 5GB image with the qcow2 format, which incrementally
increase the image size as you put more files on it. qemu-img also provide
snapshotting, store directly inside the image file.
這樣會產生一個容量為 5Gb 的硬碟檔案,映像檔的格式為 qcow2,會隨著硬碟的使用長大映像檔的大小。另外,qemu-img 也提供了硬碟 snapshot 的功能,而且是直接存在 image 內:
1 2 3 | |
After generating the disk image, setup QEMU to boot from a Debian install disk:
產生好硬碟檔之後,讓 QEMU 從抓好的 Debian 安裝光碟開機:
1
| |
Somehow the -boot parameters of QEMU looks a bit similar to DOS, you use c
for disk, d for cdrom, and a or b for floppy. -cdrom and -hda are
used to indicate CD and HD images. After booted to the Debian-installer, follow
normal steps of installing a Debian system. QEMU will automatically provide a
DHCP server for you VM.
QEMU 的參數長得白癡中帶點很可愛,-boot 控制開機裝置,不知道為什麼要接的是類似 Windows 裝置命名習慣(C代表硬碟開機、D代表光碟、A/B代表軟碟),-cdrom/-hda 用來指定光碟/硬碟印象擋,十分直覺。執行指令後變可以按照正常程序安裝 Debian 系統,QEMU 會自動模擬一個 DHCP 伺服器來餵網路到 VM 內部。
Finally, use the command to boot your VM: 安裝完畢之後便可以開機:
1
| |
Here are some boot options that might come in handy:
看到 Debian 系統正確開機,第一步驟便完成了。另外列幾個我常用 QEMU 參數。
1 2 3 4 | |
Compiling the Kernel
I’m not really going to explain the process of compiling the Linux kernel, but
if you use the .config file from Debian kernel packages, its pretty difficult
to fail. I’m using the linux-source-2.6.32 and the linux-header-2.6.32
packages from Debian.
詳細如何編譯核心不在本文的範疇內,不過如果使用 Debian patch 好的 kernel source 以及 .config大概很難失敗。我用 aptitude 安裝了 linux-source-2.6.32 以及 linux-header-2.6.32 用來編譯,只遇到了三個小問題,一個是 kernel 的 bug,一個是很小的 include 問題,最後一個我忘了XDDDD。寫筆記果然對我很重要orz
You can find the compile settings file in linux-headers-2.6.32/.config, copy
it to the source directory linux-source-2.6.32. To enable kernel support for
KGDB debugging, append the following lines to the config file:
1 2 3 | |
Apply this patch to prevent the KGDB error
with message trace API error 0x2, and run make to compile the kernel image. Finally, run the following commands to generate initrd:
1 2 3 | |
The last command will install the module files under /lib/modules. Now you
will have produced three files that you will need in next step, they are initrd-2.6.32, vmlinux and arch/i386/boot/bzImage.
- 從 linux-headers-2.6.32/ 將 .config 複製到 linux-source-2.6.32,並加入 “CONFIG_DEBUG_INFO=y” “CONFIG_KGDB=y” “CONFIG_KGDB_SERIAL_CONSOLE=y” 三行設定。
- Apply 這個 patch 不然之後連 kgdb 的時候會出現 “ trace API error 0x2.” 錯誤。
- 執行 make 產生 kernel image
- 執行 make modules ; sudo make modules_install ; mkinitramfs -o initrd-2.6.32 2.6.32 產生 initrd。
最後一步驟會把 modules 安裝到 /lib/modules/ 下面,不喜歡的話可能要設定一下 make / mkinitramfs 的參數。做到這裡,你會產生三個接下來會用到的檔案:initrd-2.6.32、vmlinux、arch/i386/boot/bzImage。
Connecting gdb to the Linux kernel
In the last step, we will use QEMU’s built-in boot loader instead of grub, and setup the required kernel parameters for KGDB:
最後一個步驟,我們要跳過 grub ,直接用 qemu 內建*的 boot loader (?) 從參數指定 kernel image 來開機,並傳入 kgdb 的參數:
1 2 3 4 5 6 | |
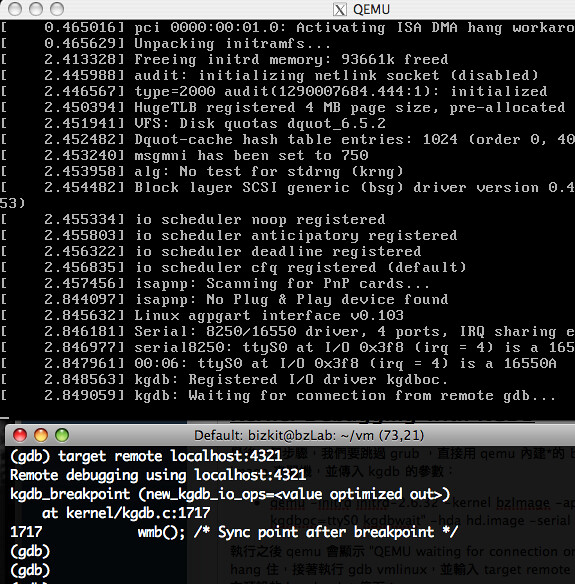
During boot, the VM will hang on:
1
| |
On the host machine, run gdb vmlinux and execute
target remote localhost:4321 to connect to the kernel.
執行之後 qemu 會顯示上述訊息 並 hang 住,接著執行 gdb vmlinux,並輸入 target remote localhost:4321 便會繼續開機,並在預設的 breakpoint 停下:
Debugging with KGDB
Once connected your VM will continue booting and stop only if you have setup
some break points. You can then use l to view currently running kernel
source, use n to step through kernel code, or use b to add a new break
point. For example, if you execute b printk, the kernel will break before
every kernel messages, and you can use c to continue running the kernel until
before the next message is printed.
接著你就可以使用 l 來看 kernel source code、用 n 來 step through code、用 b 設定 breakpoints。例如:設定 b printk,就可以看到每一次執行 continue 變會多印出一行 kernel message ~
Unlike debugging userspace programs, you cannot use C-c in gdb to stop the kernel, so if no break points are setuped before booting, there’s almost no way to stop the kernel. However, you can stop the kernel with a software inturrupt by adding the following to your code:
與一般 process 不同,我不能在 gdb 中按 C-c 來把 kernel 的執行中斷。因此,如果沒有在一開始預設 break point 設定其他 break point 便讓執行 continue 的話,便無法再次成功中斷 kernel。找到的解決方法是在需要 debug 的區域自行加上 ”break point”。(比較正確的說法好像是:在程式碼中加入 debug stub,讓執行到該位置時開始 debug 程序。對於 kgdb / gdb 的運作模式並不是狠清楚,無法詳細描述) 只要在想要 debug 區段的開頭加上:
1
| |
便會在執行到該區段時 issue 一個 debug/breakpoint interrupt,中斷 kernel 的執行。接著就可以在 gdb 中 step through code,或是動態的加入新的 breakpoints。


